About Me

My photo
My husband and I moved from Mississippi to South Carolina in July of 2012. We are excited to share our adventures from our new home!

Favorites

Powered by Blogger.

Amazon

Monday, August 29, 2011

Oven-Baked Bar-B-Q Chicken

Last night I was in desperate need of an easy recipe for a LARGE pack of chicken thighs that were taking up room in my freezer. I came across this finger licken recipe at The Hungry Mouse. It is so easy and so delicious. J could not get enough!


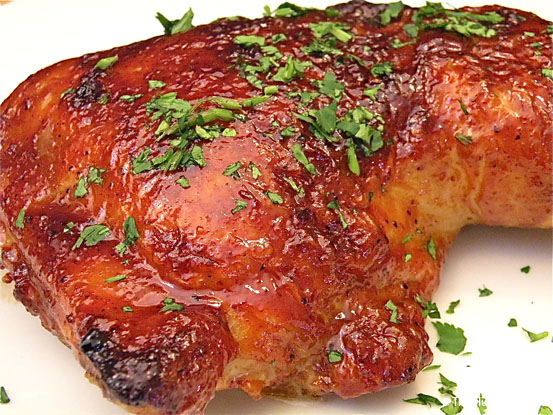
Here is a more edited version of how I did her recipe. For her full version (her BBQ sauce that she used etc.) click on her link above. How delicious does this look?! I would fix it again tonight!


Through out the recipe there are picturs of her leg quarters. I used thighs but really any part of the chicken will do.

Oven Baked BBQ Chicken

4 chicken leg quarters (or thighs or whatever piece you like)
kosher salt
spray canola oil
3/4 – 1 cup barbecue sauce
1/4 cup cilantro, chopped
Serves 2

Oven Baked BBQ Chicken:  Prep

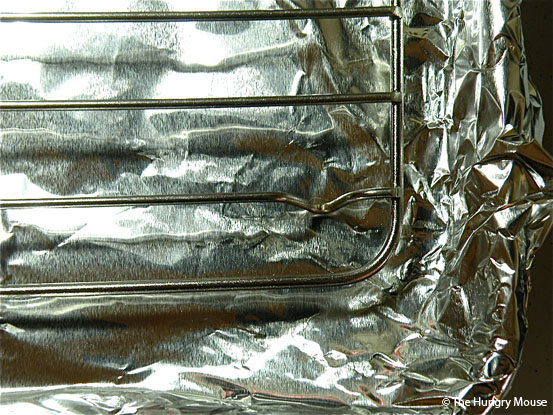
Line a sheet pan with foil. Set a rack in the pan. Set aside while you sear the chicken. Preheat your oven to 375 degrees.


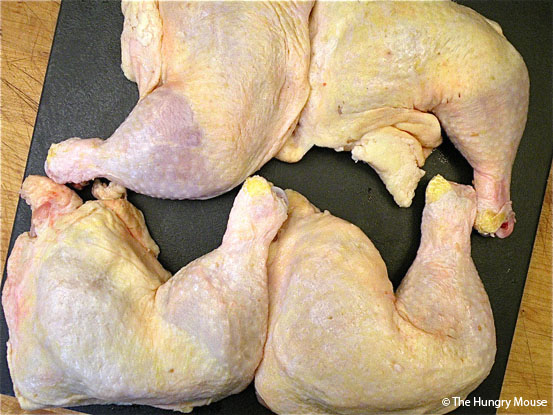
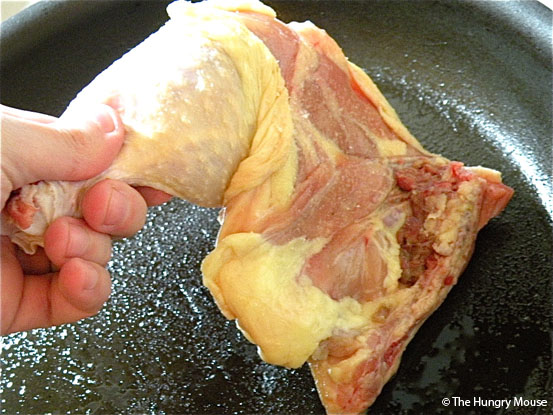
Grab your chicken leg quarters.


Give them a rinse and pat them dry.


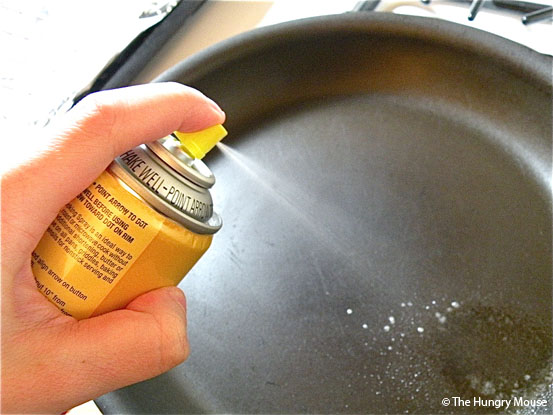
Set a nonstick pan on the stove over high heat and spray with a little canola oil. Let it heat up for a minute or two.


Oven Baked BBQ Chicken:  Sear the Chicken

When the pan is hot, drop in a few of the chicken leg quarters, skin-side down. You don’t want to crowd the pan (or your chicken will steam, not sear), so do this in a few batches.


With my thighs I was able to fit four into a pan. Searing them really adds flavor and makes them gorgeous to look at before you enhale them!

Cook them on high like this for a few minutes, until the skin is nice and brown, like this. You’re going to make a little smoke. That’s just fine. ( I made A LOT of smoke )


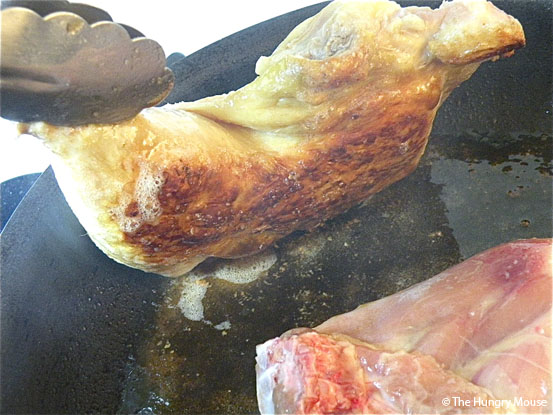
When the skin is browned, transfer the chicken to your prepared pan. Repeat with the rest of the chicken. (I only brown the skin side. I find that intense high heat on the skinless underside can dry the meat out a little.)


Oven Baked BBQ Chicken:  Brush with Sauce

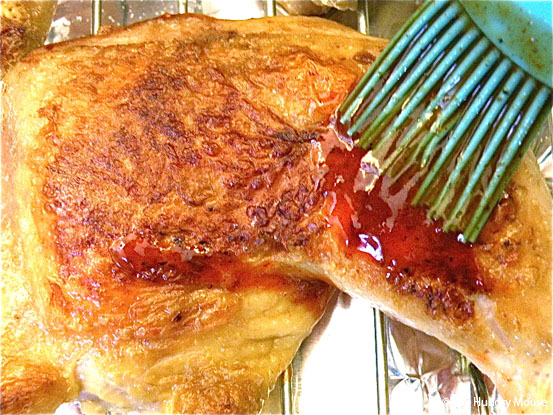
When all your chicken is browned, you’re ready to coat it in barbecue sauce. Put the sauce in a medium-sized bowl so it’s easier to work with.


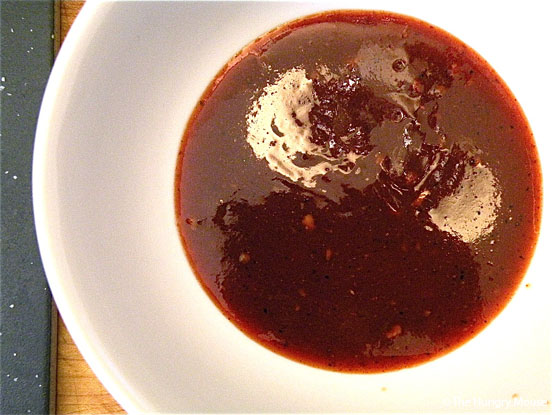
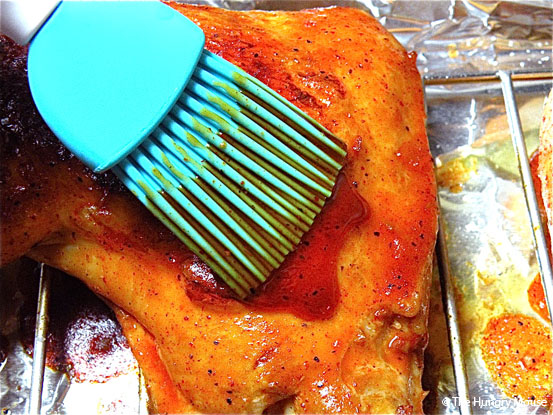
Using a brush, paint each piece of chicken on all sides with barbecue sauce.


Oven Baked BBQ Chicken: Bake for 15 min and brush with more sauce

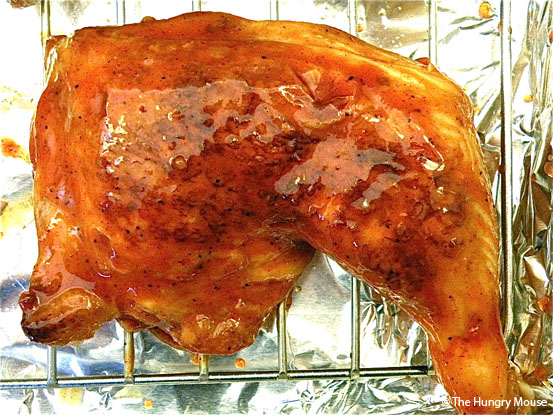
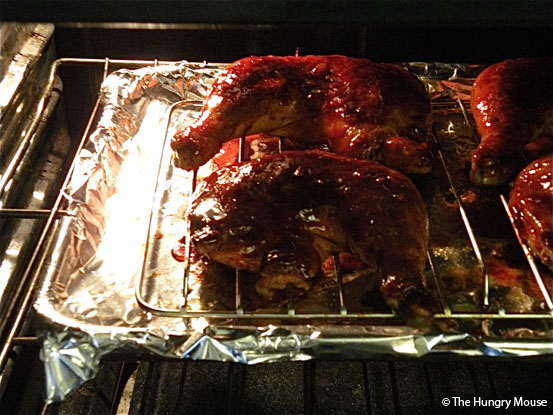
When each piece of chicken is coated, pop the pan into your preheated 375 degree oven. Bake like this for 15 minutes.


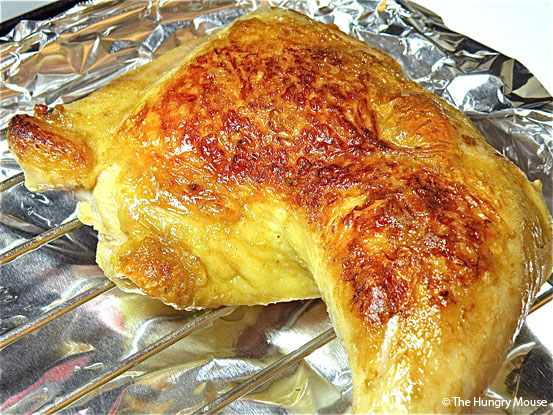
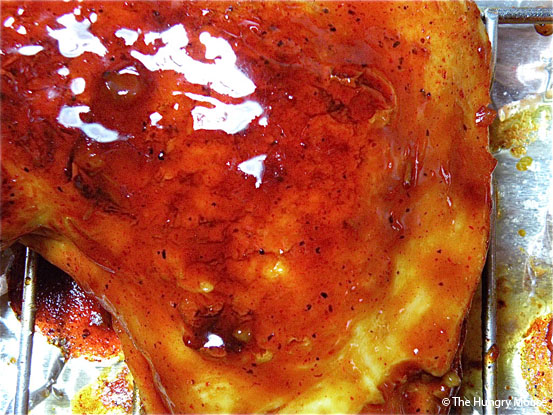
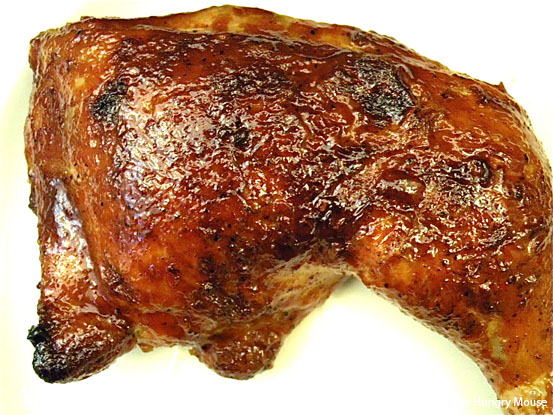
After about 15 minutes, yank the pan out of the oven. Your chicken should look about like this. (The color will vary based on the sauce you use and how much sugar is in it…the more sugar, the darker it will likely be.)


Brush with the remaining barbecue sauce, covering each piece on all sides again.


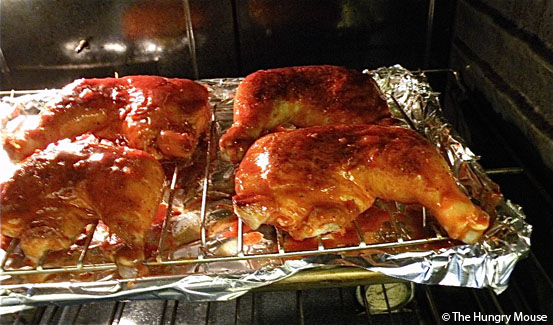
When the chicken is coated again, pop the pan back into the oven. Bake at 375 degrees for 30-35 minutes more, until they’re cooked through completely. (Your chicken should be in the oven for a total of 45-50 minutes.) Even with my small thighs, I cooked them for this amount of time and they were perfectly juicy.


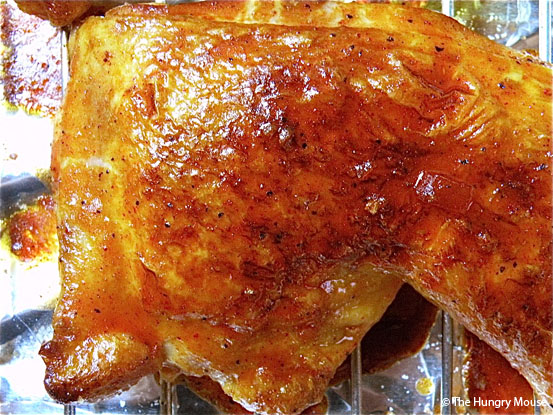
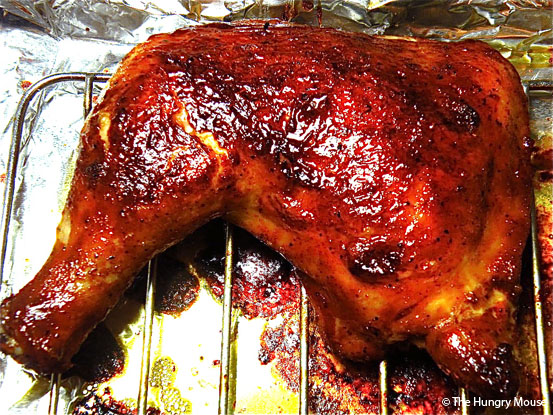
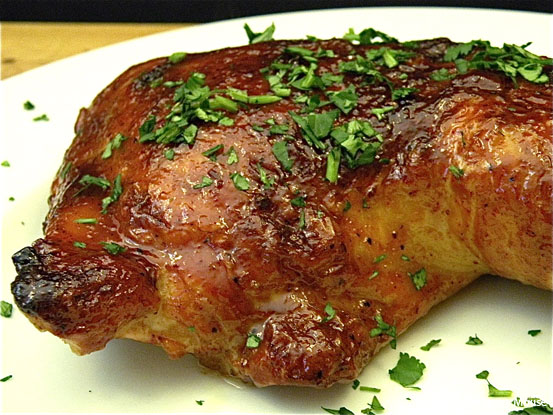
After 30-35 minutes, they should have a nice crust. If you’re a meat thermometer type, you want a reading of 165 degrees in the thickest part of the chicken (without touching a bone).


Transfer to a serving platter.


Sprinkle with chopped cilantro. ( I skipped the cilantro because I did not have any)
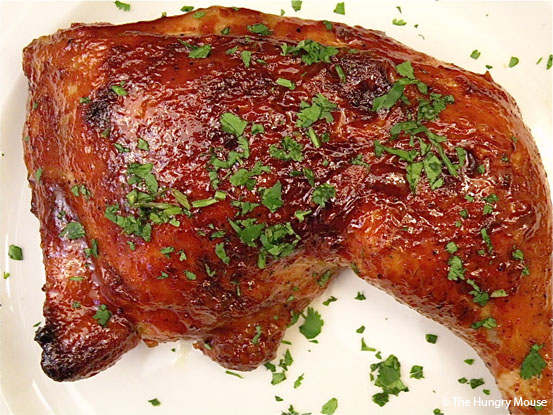


Serve and enjoy!


I know this is a very beginner/step by step process, but I am on that level of cooking and this was delicious! I served them will butter beans and potatoes. We ate like kings for a small price!!
Try this out and let me know how you like it!

Friday, August 26, 2011

Cake in a Jar

It is finally Friday and I think we need something bright and fun going into the weekend! I found a recipe for making cakes in a jar! I chose the Rainbow cake because it is so colorful and happy!

handmade wedding BabbleJarRainbow3 Rainbow Cake in a Jar


Cakes baked in jars can be topped with traditional metal canning lids and stored in the fridge for up to five days. They make a great treat to ship to someone, so long as you can ensure delivery to it’s final destination within 3 days. They are great for dinner parties or afternoons with kids! I love how creative you can be with the variations!

BabbleJarRainbow1 200x300 Rainbow Cake in a Jar
Rainbow Cake in Jar
1 box white cake mix made according to package instructions
Neon food coloring in pink, yellow, green, turquoise, and purple
3 one-pint canning jars
1 can vanilla frosting
Rainbow sprinkles
Preheat oven to 350 degrees. Thoroughly wash and dry the inside of each canning jar. Spray the inside of each jar thoroughly with nonstick cooking spray. Set aside.
Scoop about 1/2 cups of cake batter into five small bowls. It doesn’t have to be perfect, don’t panic if you get a little more of less of one color than another. Tint each bowl of cake batter with the food coloring until very vibrant.
Spoon about 3 tablespoons of the purple batter into the bottom of each jar. Spoon equal amounts of turquoise batter, then green, yellow, and pink. Place the jars in a shallow baking dish, add about 1/4″ in water in the baking dish. Place the baking dish in the oven and bake for 30-35 minutes.
Remove jars and allow to cool completely before scooping a small portion from the top of your cake and adding a hefty dollop of vanilla buttercream to the top. Sprinkle & serve, or cover with a lid and store in the fridge or pop into the mail & surprise someone you love!

Follow the link to Family Kitchen for more fun and creative eats!


Thursday, August 25, 2011

A Do-It-Yourself Weekend!

I was going to save this for Friday, but I am too excited about it to wait! I have two projects that J and I are going to tackle this weekend, Crate Plant Hangers and Stained Jars! I doubt he is as excited as I am, but he is being a good sport.

So, I found both of these or the inspiration for these on pinterest, of course.
I found this picture as my inspiration for the Crate Plant Hangers:
Plant wall . . . what a great privacy screen!

This is a beautiful way to create privacy for my carport. Because this was an inspiration picture, there were no How-to instructions on creating this.
Then I came across this picture...

and thought, huh...I can work with this! Lucky for me, I saw a pile of crates on my way home from work. I hopped myself out and loaded them into my car. Not an easy task in a dress! When J saw how excited I was we went back and he helped me load up some more. My plan is to start the project of recreating the first picture with the crates that I found. I will be sure to take pics of the process!

My next project inspiration came from this picture on pinteres

How awesome are these? I have a ton of mason jars at my house that are just sitting in my cabinets. This is a great way to jazz them up (in any color) and use them around the house and outside. I will also share how-to step by step process with pics!

Are you planning any Do-it-yourself projects this weekend?

Tuesday, August 23, 2011

I dream in pins...

A pinterest dream would include

Plant wall . . . what a great privacy screen!

Walking into my home with green privacy

Love this chair

Falling into this chair as I gaze out...

treehouse for grown ups

this window.


Great Room, with pretty colors... << Love the colors!

My living room woulde be full of textures and colors

Love the blue door

and my kitchen would be my second home.

angel food, strawberries, drizzled chocolate skewers

where I snacked on these


Of course my bathroom would show my favorite colors

old doors as a headboard/ DIY!!!

This is where I would dream in pins.

Oh to live in the dreams of pins where all looked and tasted as it should!
Do you dream in pins??


Monday, August 22, 2011

Photo Challenge/Pets


I Heart Faces is doing a photo challenge for pets, I came across this on Her Southern Charm and decided I had to enter!

This is Beau.

He is a beautiful red quarter hourse that has been my pet since I was 12. We have enjoyed many trails and rodeos in our years. Now he naps in the fields, unless I sneak up with a camera and wake him ;)

Have a pet that you think is precious? Enter their photo into the Face Challenge at

Financial Peace!


Dave Ramsey's Financial Peace

When J and I got married, I still had 3 more months of school left before I could start working. Due to some situations that popped up during our engagement, he supported both of us. The circumstances were unsual and put a financial strain on us. After we got married, we still lived off of his salary until I began working in August. We developed some credit card debt due to the pre-marriage strain in addition to all of my student loans.

Being the accountant that he is, he was determined to find a way to get us debt free. The pastor that married us let us borrow the at home Financial Peace kit and we finally broke it out a couple of weeks ago. It is amazing!! Dave Ramsey finds a way to make the discussion of debt, budgets, and saving hilariously motivating. We got to where we spent our evenings after work listening to his dvd because they were so entertaining.

We are on the road to being debt free by my 29th birthday!(currently 25)

The steps we are taking are definitely aggressive. We sat down and decided that we wanted our credit cards paid off and cancelled. This goal should be met by April 2012(turning 26). We are banking to have a couple of student loans paid off by then too. We also decided that rather than paying student loans off as they are scheduled, we are going to dedicate my  entire paycheck to them so that we can have them gone before we begin having children (estimated 29-30).


This is so exciting to think about, BUT it is going to be a tight and frustrating road. All of those home projects and pieces of furniture, and beautiful fall boots are no longer impulse buys. They are part of a budget that is saved up monthly. Every penny is budgeted.(This was a hard concept to grasp). I am now mastering coupons, and shopping deals. I am obsessed with DIY projects and want to learn to sew! SO, through this process I hope to share what I learn and hopefully learn from others!

Thursday, August 18, 2011

Quick, Budget Friendly Work Out

One thing I learned, and expected, was that all that lovely weight that was lost to get into the fabulous wedding dress comes back quickly! I love the comfortable and secure feeling I have about myself in my marriage, but my pants are not longer comfortable. J and I decided that it was time to get back in shape since neither of us can afford new wardrobes. Mr. google found us two easy workouts that are high cardio, 15 minute calorie burners!

The first one is the Kettle Ball Swing :


This is a great workout that can be done with various weight and repetitions. Our workout suggested using a 15lb kettle ball and doing 15 workdown reps (first time you do 15, second is 14, third is 13, etc. You can reverse order too). We do this workout in alternating reps with the next workout I am about to show you. My first time I had to start at about six reps because I was so out of shape.

Kettle Ball Form:
1. You want to have a flat back with a natural arch when you squat.
2. When swinging the kettle ball between your legs, you want to swing it in the high thigh area. If you swing close to your knees your back and shoulders curve.
3. Swing it forward to shoulderish height. Squeeze your butt and hold your shoulders back.

The second one is the Squat Thrust:


Wow! This is a tough workout! It looks easy breezy but this is a big cardio workout! Like I said, we alternate the kettle ball swing sets with these, (kettle ball, squat thurst, kettle ball, squat thrust). You do these reps the same as the kettle ball. If you are feeling brave, or are in better shape than me, you can jazz this up. When you get into the plank position, do a pushup before getting back into the squat. You can also add a jump into your stand after you come back from the plank(or pushup).

So these only take about 15 minutes so there is no excuse of having no time. These are guarateed to raise that heart rate and leave you sore for a couple of days! These were listed as part of the Top 10 at home workouts from Bankok Health & Fitness. Check them out for more tips!


Wednesday, August 17, 2011

Groving Goodies

I live in Oxford, Ms which inevitably means that I am part of a tent group in the grove at Ole Miss. Although I am a State fan (gasp) I enjoy socializing in the Grove. Now that I am a married woman, I participate in the bringing of food to the tent. Although J would be just fine to buy food to take, I am determined to practice my cooking skills and find some tasty reipes.

My first mouth watering find:

Ham and Cheese Sliders

courtesy of

24 good white dinner rolls
24 pieces good honey ham
24 small slices Swiss cheese
1/3 cup mayonnaise
1/3 cup miracle whip

Poppy seed sauce (you probably could half this...I had plenty extra)
1 T poppyseeds
1 1/2 T yellow mustard
1 stick butter, melted
1 T minced onion
1/2 tsp. Worcestershire sauce

In a small bowl, mix together mayonnaise and miracle whip. Spread onto both sides of the center of each roll. Place a slice of ham and a slice of Swiss inside of each roll. Close rolls and place them into a large baking dish or heavy cookie sheet. Place very close together.

In a medium bowl, whisk together all of the poppy seed sauce ingredients. Pour evenly over all of the sandwiches. Let sit 10 minutes or until butter sets slightly. Cover with foil and bake at 350 degrees for 12-15 minutes or until cheese is melted. Uncover and cook for 2 additional minutes. Serve warm.

** sandwiches can be assembled a day ahead and kept in the fridge ready to bake.

Doesn't this just sound delicious?! I am pretty sure that I am going to serve these at my main dish game!

Tuesday, August 16, 2011

Wood, Paper, Glass & Pottery

One of the biggest challenges I had when J and I moved into our new house was figuring out how to decorate it myself. In ever other move, my mother came up to help me decorate and get everything set. Well, this go around J told me I should try to do it myself and then ask her to help me with things that stumped me. Needless to say, I had several days where I just could not make anything look right. J received several text messages resembling "Come home now. The furniture is being mean to me".

I finally figured it out when I remembered my mothers big decorating tip...Wood, Paper, Glass, Pottery! I know I sound like some nutcase off the street so let me explain. Every surface or "area" does not need to be monotonous when it comes to textures. In other words, you do not want a glass table top with glass lamps, glass vases, and glass dishes. This is boring to the eye. You want to mix it up with all kinds of textures.


Metal table, Glass lamp, Wood frame, Pottery vase, and random Hardware


Books(paper), Vase(glass), Broken tile and Pottery in vase, Metal frame, Pottery candle holder

You want to make sure that you mix different colors in there as well. If you have a blanket of colors that are all the same it can be boring as well. I love basic cream back drops with splashes of color, but I realize that everyone does not like that. Use the colors that you like, just mix them up a bit!

Once I mastered this basic rule of mixing textures and colors, I was able to start attacking my living room. My first project were the built-ins. My mother always had a knack for making her shelves look artistic and interesting and I wanted to do the same.


This is a great rule for arranging furniture as well. You do not necessarily have to have the textures listed above, but it can be fun to mix solids, patterns, old pieces, new pieces and even use things as furniture that are not meant to be furniture.


When mama came up, she helped me rearrange my living room to make it more appaeling to the eyes. I love the artsy turn out combined with the shelving!